In this blog, we will be learning about ‘Blur Tool in Photoshop’, ‘Sharpen Tool in Photoshop’ and ‘Smudge Tool in Photoshop’. My name is Lalit Adhikari and we are at LTY. Let’s get started.
Blur Tool

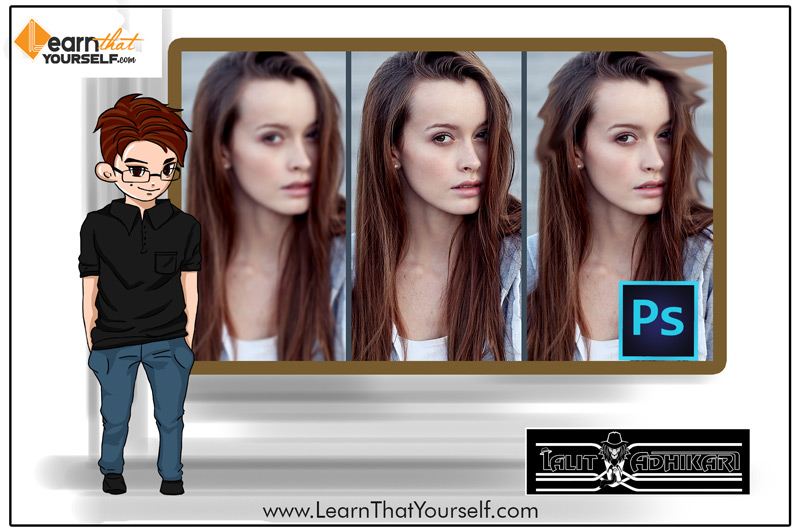
The Blur tool makes the image hazy or it is generally used to soften the harsh pixels of an image. It can also add an artistic effect to the image and which will only depend on how you’ve applied the tool.
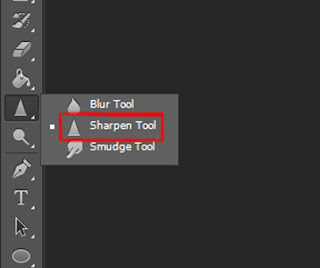
The Blur tool decreases the contrast between the pixels that are adjacent to each other. The icon of the blur tool looks like a falling water droplet.
There is a couple of options in the upper option’s panel. If you click on the downer menu then you can see all the brush presets available to it.
This is one of the tools that use the brush tip to apply the effect, so it has the same brush options as if you are using a brush tool or eraser tool.
To reduce the blur effect you can also change the ‘strength’ settings of the brush.
Sharpen tool

Sharpen tool is the second option in the fly-out menu of blur tool. Its icon looks like a sharp triangle.
The sharpen tool increases the contrast of the pixels and increases the focus on the image. You need to use this tool very carefully because ‘sharpening’ any area of the image will make that area stand out. So, make sure you don’t over sharpen it.
For example: in portrait photography, we generally sharpen ‘eyes’ of the model to stand out a bit from the image. And this sharpening is done in a very low strength to make a delicate effect.
To use this tool just select the tool from the toolbar. To apply this tool you need to have a brush tip, so select the desired brush tip from the ‘brush preset picker’ drop-down panel.
And apply it to the area of the image that you want to sharpen. Like blur tool, there are also different blending options like darken, lighten, hue, saturation etc.
You can change the strength of the ‘sharpening’ which has a maximum value of 100% and a minimum value of 0%. My advice will be to keep the value under 25% to get a subtle effect.
There is another option in this in this tool called protect detail ‘protect detail’ option and what it does is, it applies localized sharpening in a very controlled manner.
If your image has multiple layers then click on the ‘sample all layers’ option so that your editing will only be done over the active layer.
Smudge Tool

This is the third and last tool in the fly-out menu of the blur tool. It is somewhat like the blur tool, as it is used for smoothing the image. This tool acts a bit like a warping effect in liquify option.
It pushes pixels around the canvas as if it is like wet paint and it is being smudged over. And hence the name smudge tool. The smudge tool is very useful if you want to create an artistic digital painted look of your image.
In smudge tool, you select the layer you want to paint on. When you began painting, it smudges all the pixels together.
You can reduce the ‘strength’ of your smudge to get a more controlled effect. You can also work a bit more non-destructively by clicking on ‘sample all layers’. By taking a new layer you can smudge over it without tempering the original image.
Finger Painting Mode

If we choose a foreground color for example ‘red” and we began painting with that. It will add a slight hue of reddish color when you start smudging.
There is a different kind of modes in this tool like darken, lighten, multiply and so on. “Normal” is usually set as default and other modes such as “lighten” means pixels with brighter colors will be smudged.
You can also create an abstract digital painting with these smudge tool. You can load any brush you like to get the desired effect.
Note: While using these tools always try to work on a duplicate layer and never work on the original photo. Because either we have the option of masking off something that we’ve changed in order to go back to the original or deleting our duplicate layer in order to go back to the original.


Awesome post.
Hello, I read your blog from time to time and thank for helping me out every time.
Thank you for this post on blur tool, sharpen tool & smudge tool in photoshop.
Thanks, I was looking such info on smudge tool.