In this Photoshop Lesson, we’ll learn about ‘How to Crop in Photoshop’ and How to use Crop tool, Perspective Crop Tool, Slice Tool, Slice Select Tool, Eyedropper Tool, Color Sampler Tool, Ruler and Note Tool.
I am Lalit Adhikari at LTY. Let’s get started.
Related Topics:
How to crop in photoshop
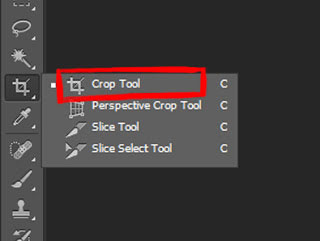
Crop Tool in Adobe Photoshop is generally used in cropping screenshots, images etc. But it is also used in matte painting or making a specific composition, as we might require removing some extra elements from our artwork which are irrelevant.

Let’s look at the options available at the options bar when we choose the Crop tool. Starting with the last option i.e., ‘Delete Cropped Pixels’.
Related Topics:
Delete Crop Pixels
If you have that option selected after you crop all those pixels, the outside of the selection screen will be deleted.
It’s Use
If we select the crop tool (short key for this tool is C) and click on our image here and shrink the selection down and press Enter key then cropped pixels outside the selection are all deleted. This is a destructive way of editing.
The option ‘Delete Crop Pixels’ is usually checked in the default setting, the standard advice is to keep it unchecked.
We can keep this option checked in situations, like, matte painting, where some elements of the image are getting off the canvas and we don’t have any requirement of those extra bits. So, we can remove those using this feature.
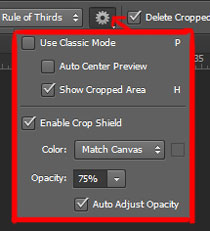
On the left side of the “Delete Crop Pixels,” there is a setting button. And if we click on that, we could see two modes and these are:
- Classic Mode
- Enable Crop Shield
Related Topics:
Classic Mode
This mode is usually unchecked in the default setting. If we check this option and use our crop tool and move the crop box around, we can see that only the crop box is moving and the image is still.
But if it’s kept unchecked and we then try to move our crop box, we will find the tool is still but the image inside it is moving.
In classic mode, there are other options:
- Auto Center Preview: In this mode, the crop tool is aligned in the center of the image automatically.
- Show Cropped Area: In this, we can see the area outside the crop box which will be cropped.
Enable Crop Shield
This mode is usually checked in the default setting. In this option, we can change the color of the outside area.
It comes with two options custom and matches canvas. In custom, we can pick any color we want and in match canvas, the color remains the same as the work-space.
Below this, there is an option for adjusting the opacity of the area outside the crop box.
Related Topics:
View
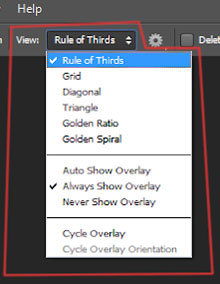
The next option is ‘View’. By default, we have the Rule of Thirds. In this option, the grid specifically divides our image into three equal blocks.
There is another option which is very useful for composition called ‘Golden Ratio’, it is slightly different from the rule of third.
In this, the grid will divide the image into the three blocks but all three blocks will not be equal, the middle block is usually smaller. There are many other options that you can choose according to your designs such as grid, diagonal, golden spiral etc.
Straighten
In this option, we can draw a line on any specific portion of the image and based on that line the image will automatically straighten. After that, we can crop the image based on that horizon line.
If we keep moving to the left side of the upper panel then we can see an option called “ratio” in Adobe Photoshop CC and in the CS6 version it is “unconstrained”.
This option is generally used if we are trying to crop our image based on the aspect ratio and we can change the ratio to whatever we want.
Related Topics:
Perspective Crop Tool
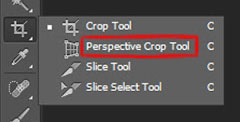
The way this tool works, you can take and set your points on each of the corners of the image which needs a change in it’s perspective.
How to use this tool
Select one of the corners and then while going down select another one. You can see once you’ve made two selection points you will get a mesh that you can pan over your image.
So by clicking on other corners of the image, you can make your desired selection.
After this, you can see that it kind of acts like a crop tool where it blacks out some of the other areas and you can see what you are actually cropping here in full color (original color).
After you made the selection you can click on the check mark at the upper option panel in order to create the cropping.
Now, keep in mind that it isn’t always going to be 100% perfect, you need to make further editing to fix that as this is just a basic step.
Related Topics:
- Skin Retouching
- Eraser tool in Photoshop
- Foreground color, Background color, Stroke and Fill in Photoshop
Slice tool
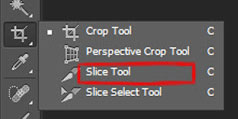
The slice tool’s function is to break up your Photoshop document into a different section.
The first of which is going to be defined by a rectangular box, and then with the other remaining space inside of your Photoshop image will automatically create slice sections that are going to be added to your document.
If you export your document to the “Save for Web” then each of these different sections is going to be taken in as an image that will display on the web page.
By editing the details in each of these different sections you can add URLs to each image, a name, and a description or any other information.
The slice tool is designed mostly to be a Website Designing Tool.
Related Topics:
- Blur tool, Sharpen tool and Smudge tool in Photoshop
- Burn tool, Dodge tool and Sponge tool in Photoshop
- How to use Gradient tool in Photoshop
Slice Select Tool

After the slices are created on your document, you can manipulate them with the Slice Select Tool.
By double-clicking on the slice you can add in information such as URLs that slice image will go to when you will click on it in the web page version or dividing a slice into multiple slices or resizing them.
Related Topics:
- Healing tools, Clone Stamp tool and Pattern Stamp tool in Photoshop
- Color Replacement tool and Mixer Brush tool in Photoshop
- History brush tool and Art history brush tool in Photoshop
Eye Dropper Tool
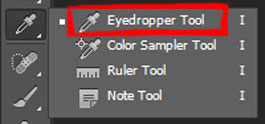
The eye dropper is effective when you are making a design, it could be a brochure, website or some kind of digital painting and you wanted to pull a color out of a photo reference you have.
To use this tool you can select the eyedropper tool from the toolbar of Photoshop or press I on the keyboard for the shortcut.
If you have the foreground color selected on top and then you click anywhere on the image while selecting the eyedropper tool then it will change the foreground color to that color.
In case of background color, if we select that box and then click anywhere in the image then the background color will change.

By default, if you click anywhere in the image it will change the foreground color. But using Alt we can change the background color too.
In the top panel, there is an option called “Point Sample”. This is a default setting and it means that wherever you are clicking that specific one pixel is what you are sampling.
There are also other options below that and it generally averages out the hue of that area and set it to the foreground or background color.
Show Sampling Ring
If you click and drag the eyedropper tool around your image then you can see that the top area of the ring is the new color (in which the foreground color will be set) and the bottom part of the ring is the current layer in which the foreground color is presently set in.
Related Topics:
Color Sampler Tool
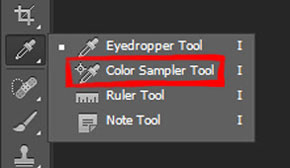
If you click on the image (maximum four clicks), an information tab will open. And in that tab, the information about the pixels under those points will be there (RGB values).
If we move that image around then we could clearly see the changes in the values of RGB levels.
To change the position of those points you can hover the cursor while selecting the color sampler tool and when you see the arrow symbol you can simply move those points.
And to delete those points, hold alt key on the keyboard and you can see a scissor symbol.
And clicking on that those points will delete them. But one thing to put in mind is that color sampler tool will only allow a maximum of four color samples at the same time.
Related Topics:
Ruler Tool
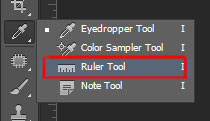
This tool is in the third option in the fly-out menu of the eyedropper tool. To access this tool go to the upper menu bar of the Photoshop Interface and select the ‘View’. A drop-down menu will open up; check on the ‘Ruler’ option or simply press Ctrl + R
Then click on the ‘new guide’ option from the same drop-down menu.
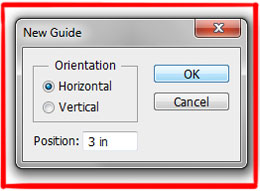
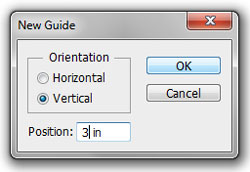
In the appeared ‘dialogue box’ set the position of ‘vertical’ or ‘horizontal guide’ to your desired location and click on the ‘OK’ button.
To lock these guides go to the same ‘View’ panel drop-down menu and check the ’lock guides’ option by selecting it. By doing these you are locking the guides and it will not move until you again unlock them.
To remove all the guides select ‘Clear Guides’ option from the same drop-down menu of the ‘View Panel’ or press Ctrl + : for hiding the guides. These guides are not printable.
Related Topics:
Note Tool

This is the fourth and last option the fly-out menu of the eyedropper tool. To use this tool select the note tool and click anywhere in your document. It will leave a ‘note’ icon’, you can change the color of that icon from the above menu bar.
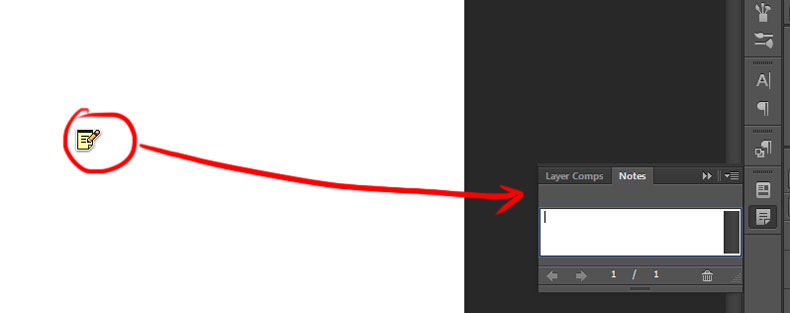
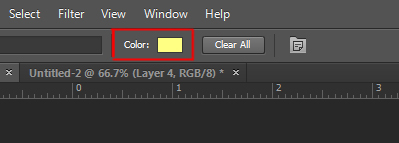
As soon as you create ‘note’, a note panel will pop open on the right side of your interface. You can clear all notes by clicking the ‘Clear All’ button in the menu bar or hide the notes by pressing Ctrl + H
Generally, this tool is used when you are delivering the file to a client and there are changes that need to be fixed. You can write any information like things need to be done or any scopes of improvement in your artwork.
Like the ruler tool, this tool is also not printable. So even if you don’t clear the notes it will not appear on your printed copy.
If you are following our Free Photoshop Lessons and Tutorial Guide, then next you should read about, ‘Brush tool in Photoshop‘.
Related Topics:








Very Nice brother, you describe each and everything clearly.