In this illustrator lesson, I will be discussing about Perspective Grid tool and Perspective Selection Tool in Illustrator at LTY. I am Lalit Adhikari, let’s dive into the topic.
Before you understand anything about this tool, you should have a basic understanding of perspective in art and design. Drawing in perspective makes your sketches look more realistic and helps communicate your design in a much more successful way.
Table of Contents
Types of Perspective
There are different types of Perspective design to suit different subjects. Here, I will be discussing mainly three perspectives.
One point perspective
Two point perspective
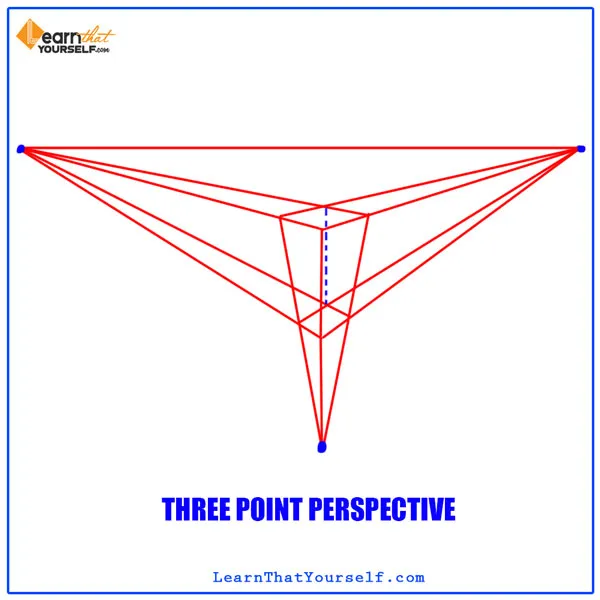
Three-point perspective
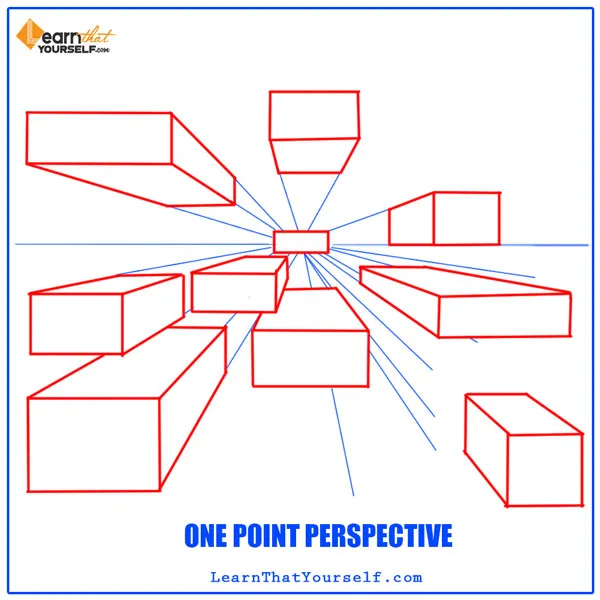
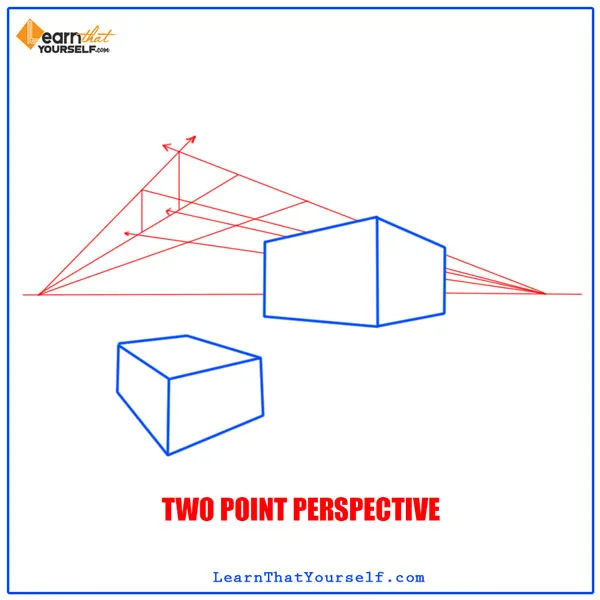
Basically, what makes this one, two and three-point perspective are its vanishing points.
In the first image, at One Point Perspective, you have one vanishing point.
At Two Point Perspective you have two vanishing points and at Three-Point Perspective, there are three vanishing points (one on each side and the third one is either up or down).
Related Topics:
- Selection Tools in illustrator
- Width Tool, Warp Tool, Twirl Tool, Pucker Tool, Bloat Tool, Scallop Tool, Crystallize Tool and Wrinkle Tool in illustrator
- Shape Builder Tool, Live Paint Bucket Tool and Live Paint Selection Tool in illustrator
Perspective Grid Tool
The Perspective Grid Tool in Adobe Illustrator will help you do all three of these.
To get the grid up in your canvas, you have to go to the toolbar which is usually in the left side of the interface.
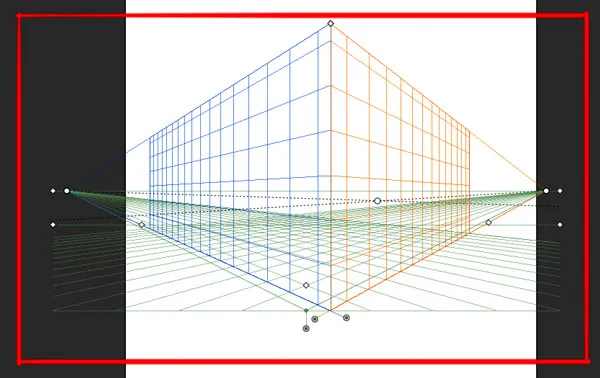
Right on the middle of the right-hand column of the toolbar, you will find the Perspective Grid Tool. And if you click on that option your perspective grid will pop up on your canvas. The shortcut key for hiding or showing this tool is Ctrl + Shift+ I.
The default as you can see in the above image is set for two-point perspective as there’s a vanishing point on each side.
If you select the view menu from the above menu bar and then down to the ‘Perspective Grid’ option a fly-out menu will open up where you can change your grid to one, two or three point perspective.
In order to manipulate the grid, you have to keep the perspective tool selected. And then you can drag the points around so that you can change the perspective however you want bigger, smaller or narrow.
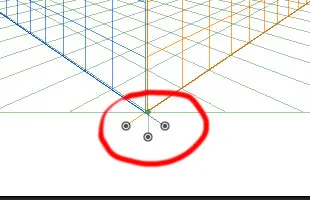
The three grids down at the bottom will actually let you move different planes separately and independently.
You can see that each plane is of a different color on the grid. You can also customize your colors by going back to the ‘Perspective Grid option’ in the view menu and then select ‘Define Grid’ option from the flyout menu.
A dialogue box will open up as you click on that option. In that dialogue, there are different options by which you can customize your grid like you can change the units, scale color as well as the opacity of the grid.
Use of Perspective Grid tool & Perspective Selection Tool
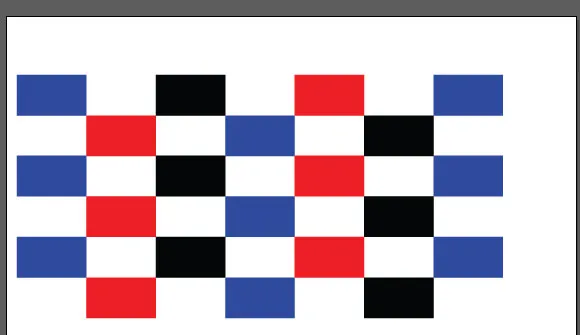
Here, I have made a simple pattern by the shape tool and grouped them together. Now, switch on to your grid. In this design, I want to apply this pattern on both the planes (left side and the right side).
So, make a duplicate copy of this pattern and move it off your artboard.
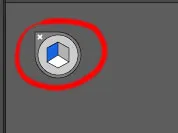
Keeping your flat graphics selected, look up at the little winglet icon on the left-hand side of the interface. That icon means that you have a blue side selected and your pattern will be applied on the left-hand side.
To apply the pattern, first, select the perspective selection tool (which is in the bottom of the perspective grid tool) and then hold down the Shift key.
As soon as you hold the Shift key, you will see your pattern already applied to your perspective. Now, drag your graphic on the blue side of the grid and then let go of the Shift key, it will automatically apply to the perspective.
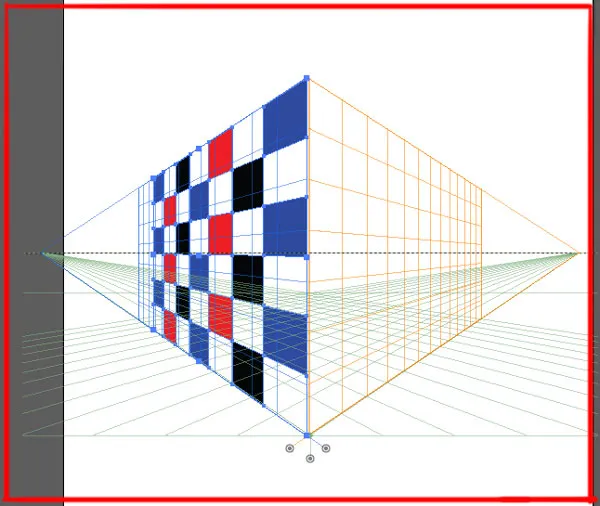
You can grab into the corners of your pattern and further adjust it to the edges.
You can follow the same process on the second side. But keep in mind that you need to place the pattern on the orange side of the grid (which is the right side).
So, after you select the perspective selection tool and press number 3 on your keyboard to select the third side (2 is the green side or bottom). Then only you can apply your pattern correctly on the orange side.
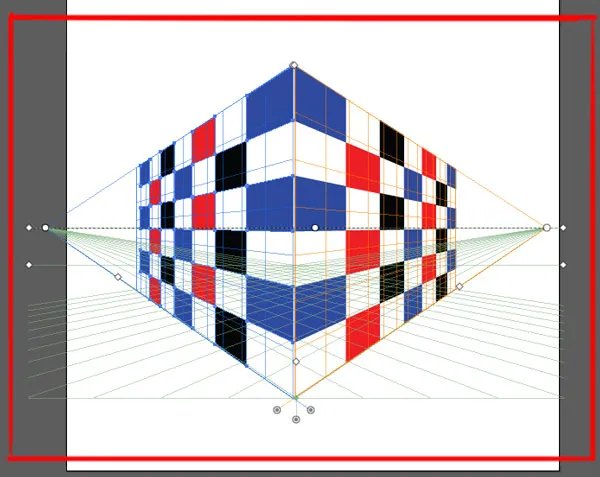
And that’s how you can easily put your patterns in perspective by perspective grid tool.
About the Author
Lalit M. S. Adhikari is a Digital Nomad and Educator since 2009 in design education, graphic design and animation. He’s taught 500+ students and created 200+ educational articles on design topics. His teaching approach emphasizes clarity, practical application and helping learners.
Learn more about Lalit Adhikari.
This guide is regularly updated with the latest information about Adobe tools and design best practices. Last Updated: Mar 2026
Related Topics:
- How to use Gradient Tool in Adobe Illustrator
- How to use Mesh Tool in illustrator
- How to make a Semicircle in Adobe Illustrator
- How to Design a Retro Flower Pattern in illustrator
- How to set Brush Pressure in illustrator
- How to Create A Pressure Sensitive Brush in Adobe Illustrator
- How to Create Metallic Effect in illustrator
- How to Create Flower using Gradient Mesh in illustrator
- How to Recolor Artwork in illustrator
- How to Create Silver Metallic Effect in Illustrator








Perspective Tool in Illustrator | Learn That Yourself
Good Post! Thank you!