In this blog, I will be discussing about, ‘Photoshop Channels’ or ‘Channels in Photoshop’. My name is Lalit Adhikari and we are at LTY. Let’s begin!
Table of Contents
Introduction
In this blog post, you will learn ‘How to use channels to make a selection in Adobe Photoshop’ weather you might want to replace the skies or you want to select something intricate.
This is a kind of selection method that you might use when all the other selection method doesn’t work like Pen tool, Selection tools and options under Select menu. And that’s when this method becomes so useful.
Understanding Channels
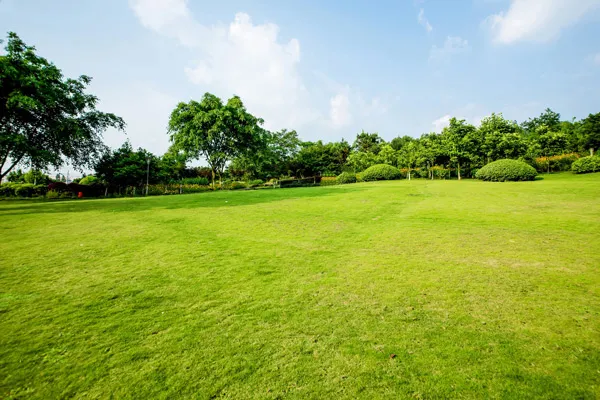
Now, in this image suppose we want to replace the skies but the trees are making it very hard to get a perfectly clean selection. So in this type of image ‘the channel selection’ method becomes useful.
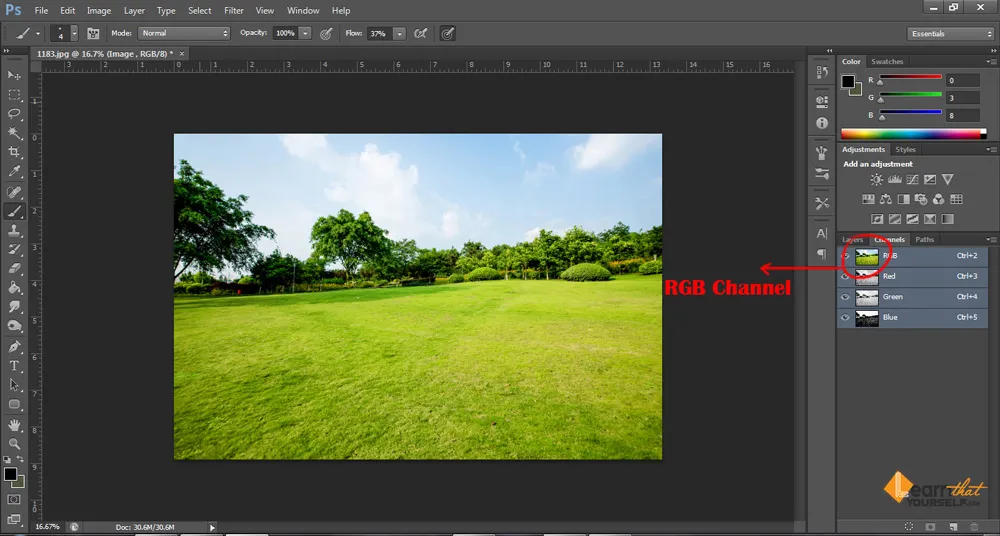
Every image that you see on screen is composed of three colors red, green and blue. So, let’s move on to channels by clicking on to channels tab adjacent to the layers tab. You can also access this by clicking on the ‘window and then selecting ‘channels’. When the channel’s tab opens the first option you will see is RGB channel and this is the channels which combine all the three colors.
Related Topics:
So, you will see all the colors visible in your image. Underneath this channel, there is the Red, Blue and Green channel and all these combine to give you RGB composite. But, you might wonder why these images are black & white? And the main reason for this is that these are only a representation of those channels.
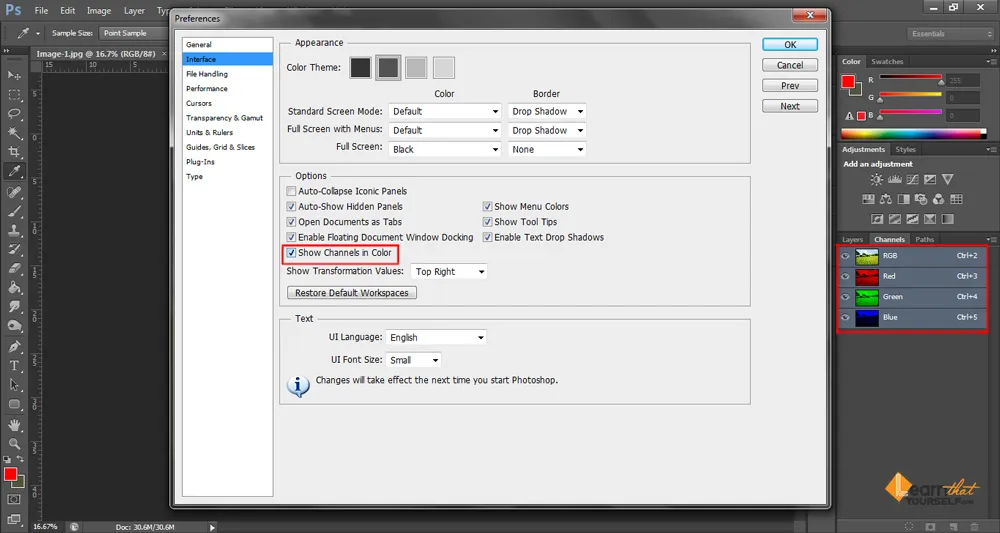
Note: If you have trouble watching these layers in black & white then you can change it by going to Edit menu and then selecting ‘preferences’. A fly out menu will open up from which you can select the ‘interface’ option.
As you click the interface a dialogue box will open up and at the bottom of the channel you will find a checkbox of ‘Show Channels in Color’. Make sure you check that option and click ‘ok’ to see all your channel layers in their respective colors.
Related Topics:
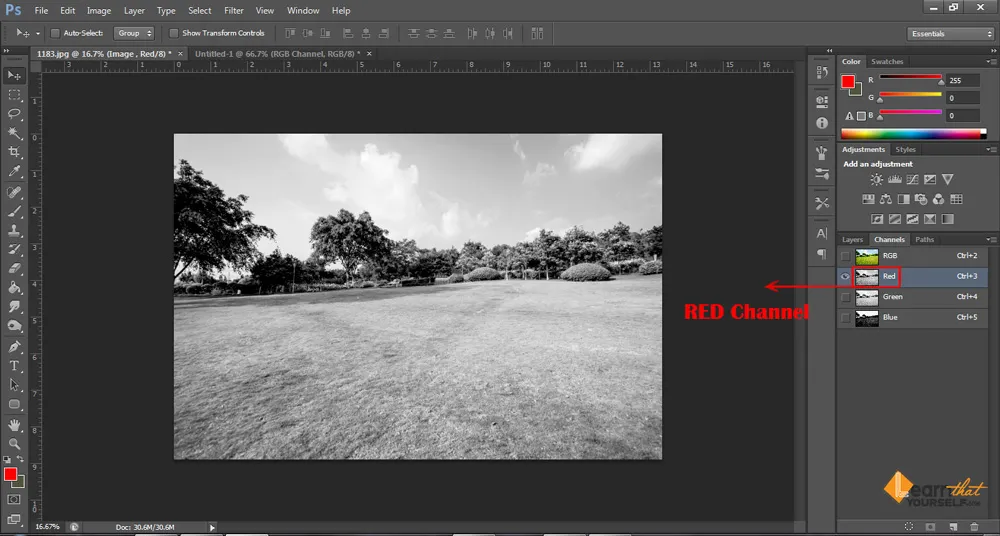
Now, if I move on to the Red channel, the areas that are more white are the areas where red is most applied and the areas that are black are the areas where red is least applied. So, when it is completely black, there is no Red color.
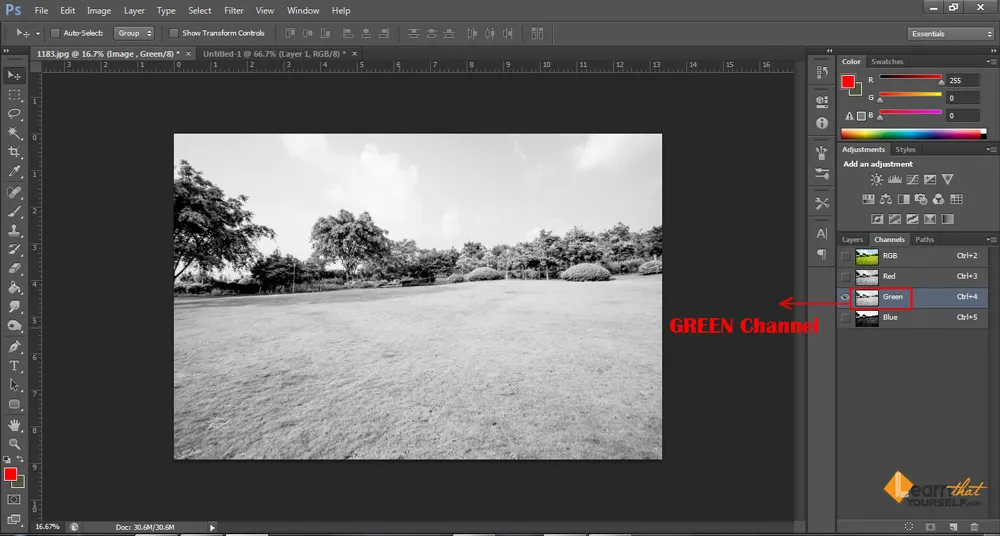
In the Green channel, the land can be so bright, may be brighter than the other channels because it has more greenish hue in it.
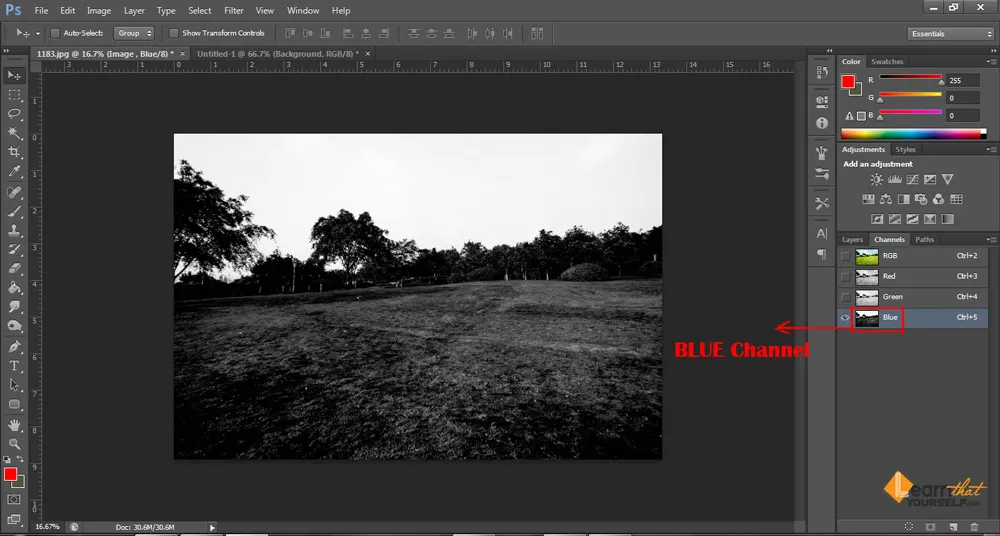
Now, let’s move on to the Blue channel. Since our sky is blue therefore you can see the sky is quite bright on this channel. And the ground is green, there’s lesser blue in it, therefore, it is dark. So, the more there is brightness in the image, the more color you have on that particular channel.
Now, let me tell you how this process will help. At first, you need to find a channel in which your sky is very bright and the foreground is very dark to make this process work, and in this case, it’s Blue channel. Therefore, this channel will help you as a mask to select the skies.
But there are still a couple of adjustments we need to do as the ground is not completely black and the sky is not completely white. So, to do that, first, make a copy of this mask. Press Ctrl on your keyboard and click on that layer. This will make a selection based upon the luminosity as brighter areas will be selected and darker will remain unselected.
Related Topics:
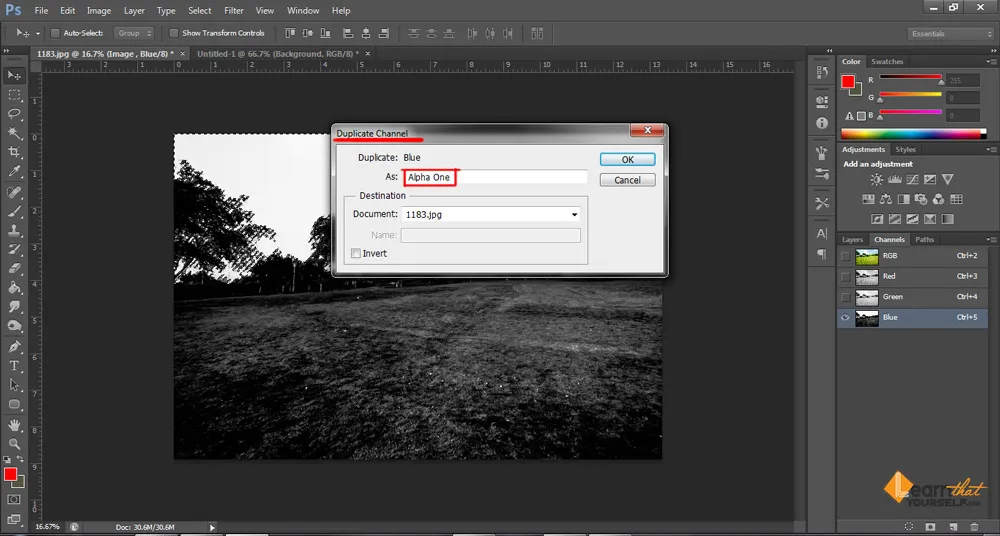
Make a copy of this channel by clicking on it and it will be called as ‘alpha one’, then deselect it by hitting Ctrl + D
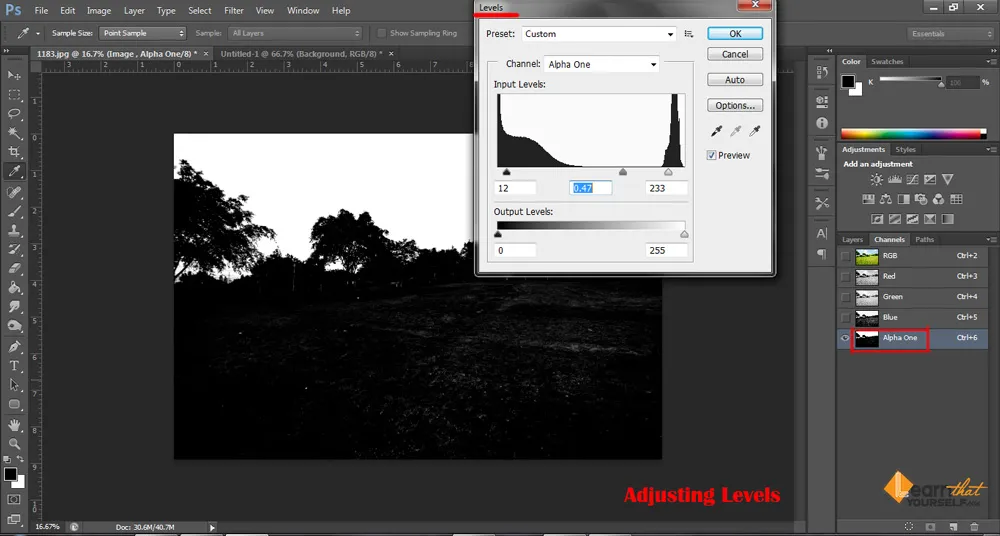
Now, our job is to make the sky completely white and the ground completely black. So, to make this happen you need to go to the Image menu in the menu bar, select ‘adjustments’ and then ‘levels’ from the fly-out menu. As the dialogue box opens up, start adjusting the slider until the expected result is acquired.
After you’ve done that, you can compare the ‘before’ and ‘after’ of the image by checking on the ‘preview’ checkbox on the right side of the slider. And after you achieve what you want, click ‘ok’ and the dialogue box will vanish.
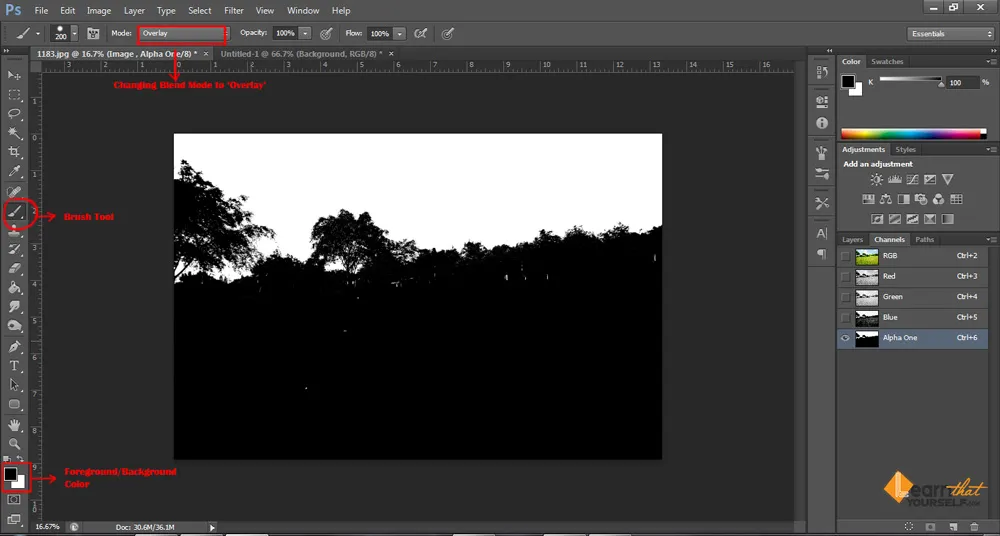
But even though all these, you can still see some gray areas of the image that needs to darken and some areas that’s need to brighten. So, to do this, select a brush and start painting over the image.
But before this, change the brush mode to ‘overlay’ and go back to the layers tab and select the image. Then come back to the channels tab and select the ‘alpha one’ layer. Start painting until all the areas turn into black or white.
Now, even if you spill white paint over the black region it will not affect the image as you’ve selected the ‘overlay’ mode which makes the bright part brighter and dark part darker. So, if you have white selected as the foreground color, anything black will remain unchanged and the bright part will get highlighted more and vice versa.
So, after you made the image completely black and white, press Ctrl while clicking on the ‘alpha one’ layer and come back to the channel tab making sure your target image is selected.
Related Topics:
- Step by Step guide for Retro 3D Movie Effect in Photoshop
- 5 Types of Masking in Photoshop
- Photoshop Gold Text Effect
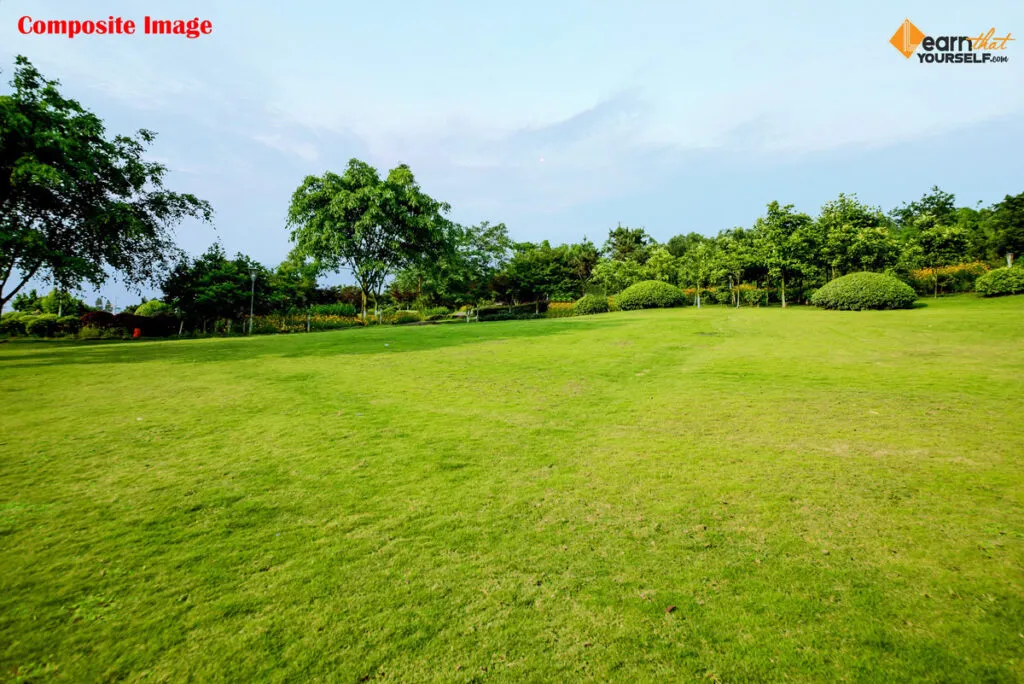
After that click on the layer mask option. Now, you might find that the opposite thing happened as the foreground got masked and the sky is still visible. So, to get the inverted result, select the mask and hit Ctrl + I on your keyboard. Now, you will see the sky is perfectly masked and is gone, so we are basically left with a perfectly selected foreground.
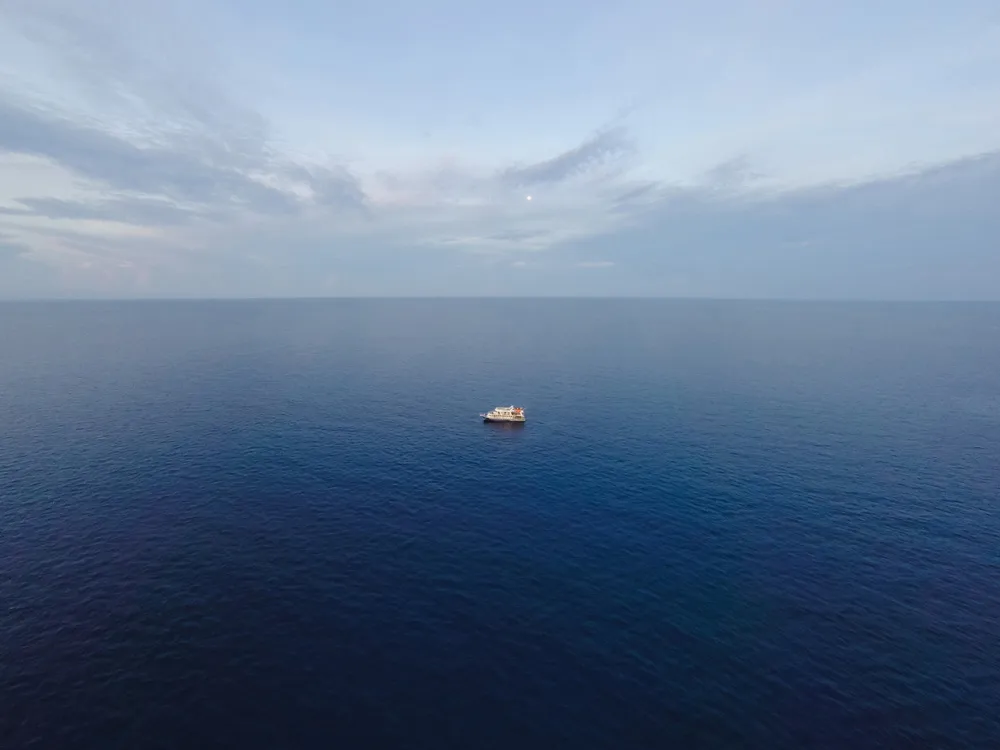
For example: I took an image of a landscape and removed its background by selecting it with channels and making a mask. Then I took another image of the sky and placed it in the background while making a few adjustments.
And in this way, you can also add any of your backgrounds and make your composition more accurate.
As this blog only includes channels and their use, so I am not finalizing this composite using other adjustments here.
Related Topics:
About the Author
Lalit M. S. Adhikari is a Digital Nomad and Educator since 2009 in design education, graphic design and animation. He’s taught 500+ students and created 200+ educational articles on design topics. His teaching approach emphasizes clarity, practical application and helping learners.
Learn more about Lalit Adhikari.
Last Updated: December 2025
This guide is regularly updated with the latest information about Adobe tools and design best practices. Last Updated: Mar 2026
Related Topics:
- How to enlarge an image in Photoshop
- Fade Command in Edit menu in Photoshop
- Search in Photoshop
- Check Spelling in Photoshop
- Find and Replace Text in Photoshop
- Fill in Photoshop
- Stroke in Photoshop
- Content-Aware Fill in Photoshop
- Content-Aware Scale in Photoshop
- Puppet Warp in Photoshop











Comments are closed.