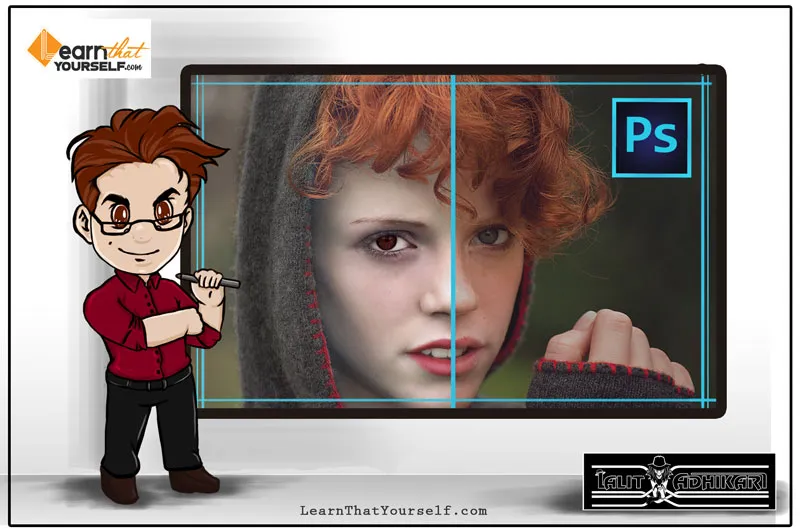
In this blog, I will be discussing about, ‘Skin Retouching in Photoshop‘ and ‘How to recreate skin texture & contouring’. I am Lalit Adhikari and we are at LTY. Let’s begin!
Table of Contents
Introduction
Today’s beauty retouching methods are oversaturated with information on how to retouch things in Photoshop but sometimes it’s very hard to recognize what we need to retouch to make the subject of the photo more attractive. And as the art of retouch is still new there’s no solid fundamental process which we can call the classic way of retouching.
In one of my previous blog post on Healing tools & Clone stamp tool & Pattern stamp tool in Photoshop, I had explained the mechanisms and properties of Healing tools that we are going to use for retouching. And in this blog post, we will see the practical application of these tools along with some other tools to make your retouching process much smoother and less time-consuming.
In this blog, I will be discussing, ‘Skin smoothening’ and ‘Recreating skin texture & Contour’.
Related Topics:
Images
If you will be searching for raw photos for retouching purpose, it is going to be a bit tricky.
As most of images you will encounter on stock websites or royalty free websites are usually retouched. So, you will have to do a bit of research of your own to find some images to practice this exercise.
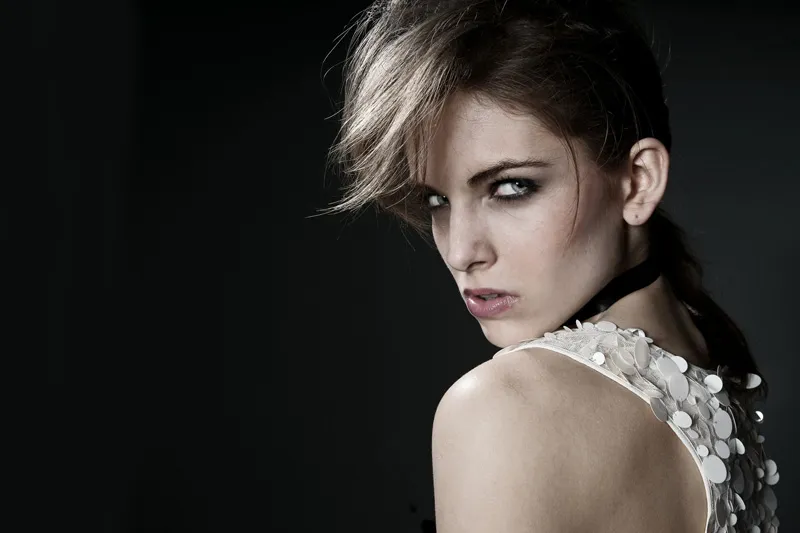
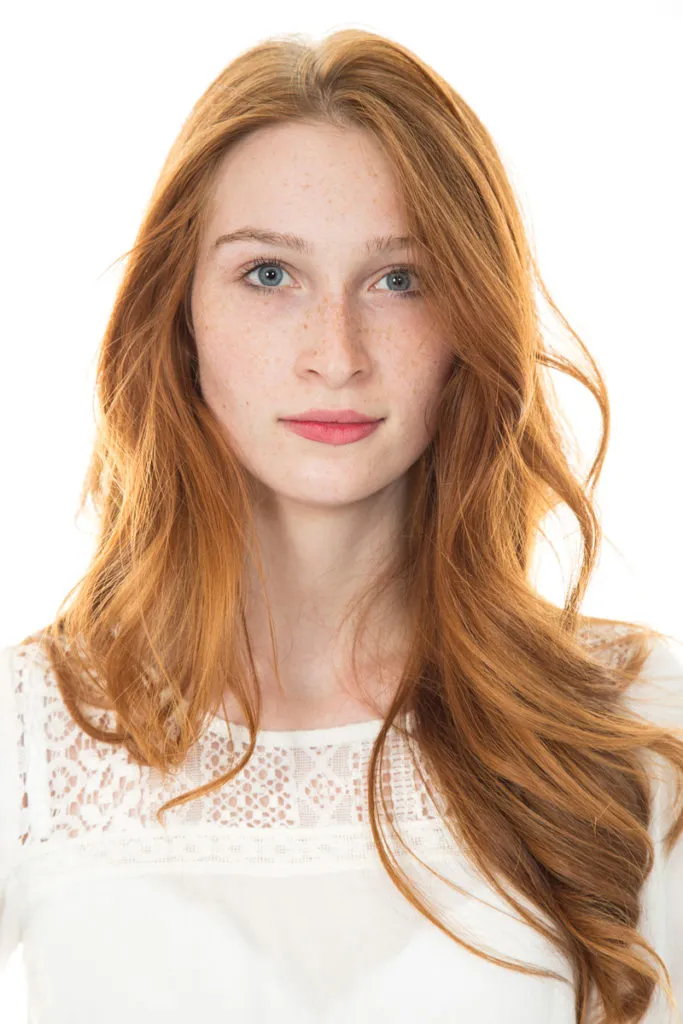
I would recommend using your own photos or using your friends images for practice. I will be using following 2 images from Freepik.
Related Topics:
- How to Add Falling Snow in Photoshop
- Step by Step guide for Retro 3D Movie Effect in Photoshop
- Photoshop Gold Text Effect
Skin Smoothening
Before we begin skin smoothening, you need to heal any irregularities or blemishes from the image. I am not getting into detail of healing as it has been discussed in ‘Healing tools & Clone stamp tool & Pattern stamp tool in Photoshop’ blog.
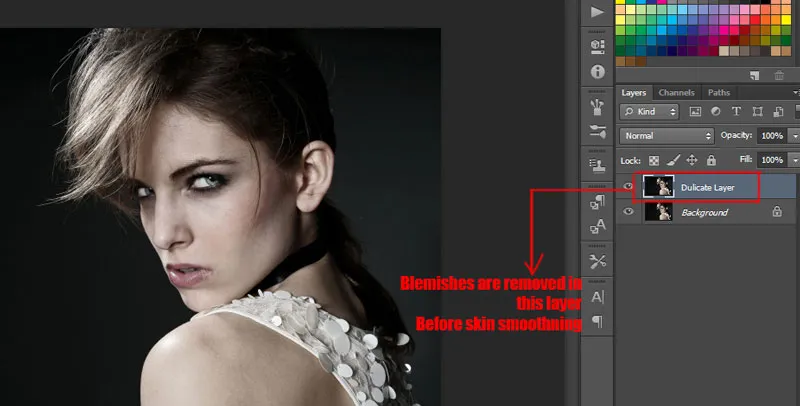
In this blog post, we are going to learn how to make skin smooth with skin texture still intact. The first thing you need to do is duplicate the background layer and to do that press Ctrl + J on your keyboard.
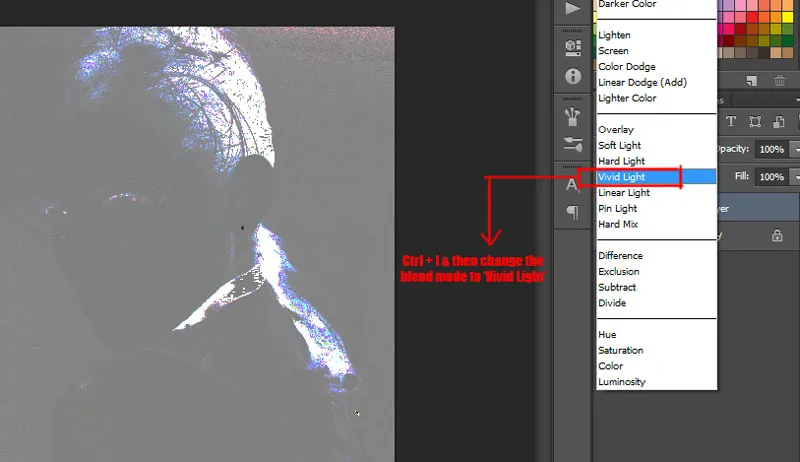
After doing this invert the image by pressing Ctrl + I
Now, after inverting the image, change the blend mode from ‘Normal‘ to ‘Vivid Light’ or ‘Overlay’ depending upon your image.
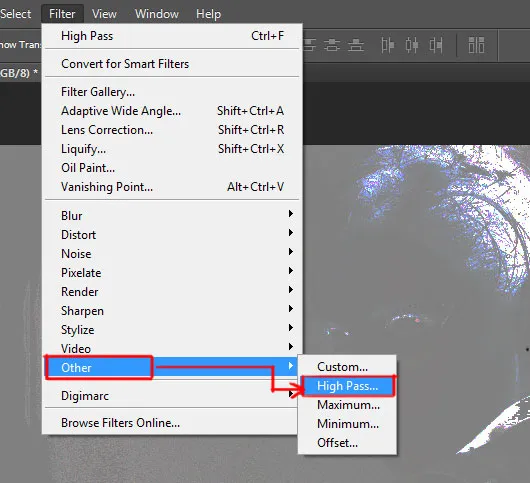
Keeping the duplicate layer selected, open the filter menu from the menu bar. In the ‘Filter menu’ choose ‘Other’, it will open up a flyout menu which has options like custom, high pass, maximum, minimum and offset. From this menu choose ‘high pass’.
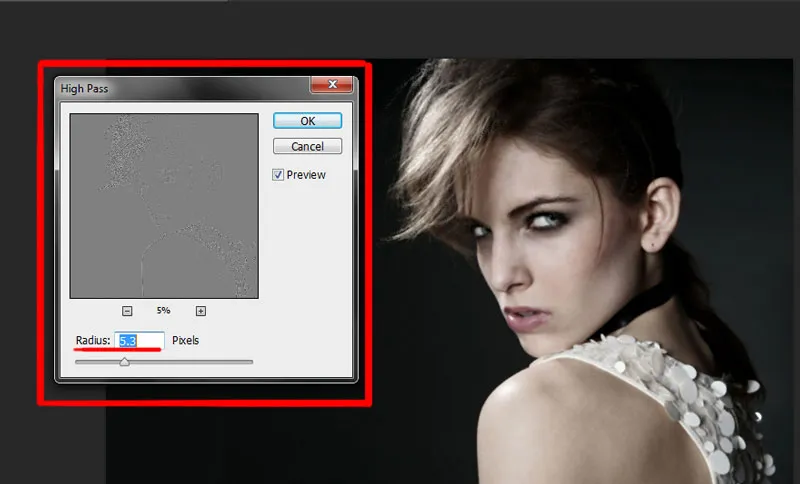
As you click on it a ‘dialogue box’ will appear. There set the pixel radius and for this image, I set it to 5.3
Again open the Filter menu, and this time select ‘Blur’. This will also open up a flyout menu with various ‘Blur’ option. But from all these blur options choose ‘Gaussian Blur’. Same as the ‘High pass’ option a dialogue box will open up.
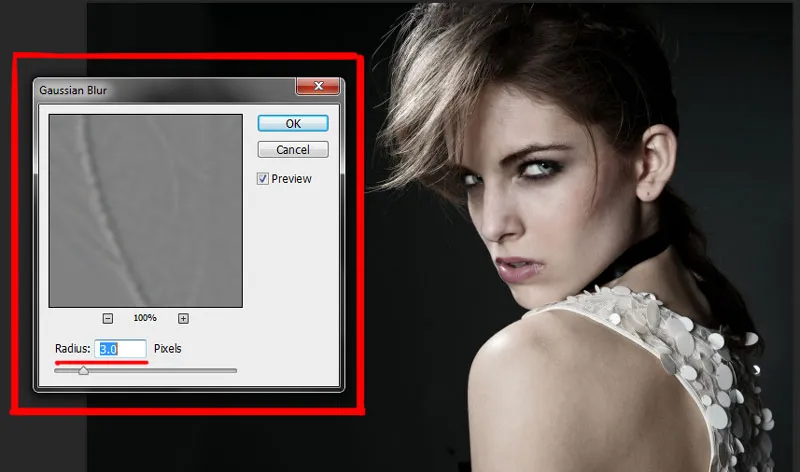
Set the radius of the pixel in a very low amount. For this image, I’ve set this to 3 pixels. Keep the value in such a way that it accentuates the pores in the skin and the skin texture.
Note: Gaussian Blur works in an opposite way after we apply it over the high pass filter. So, as you increase the pixel radius it will increase the sharpness of the image. Hence, you can use this step to sharpen up your image too.
Now, you can see that the skin is relatively smooth but the problem is the smoothness applies all over the image, even to places where we don’t want to have it like clothes, eye brows, hair etc. To fix this we need to create an ‘inverted mask’ or ‘black mask’ or ‘negative mask‘ on this image.
Press Alt and click on mask icon to create a mask over the whole image.
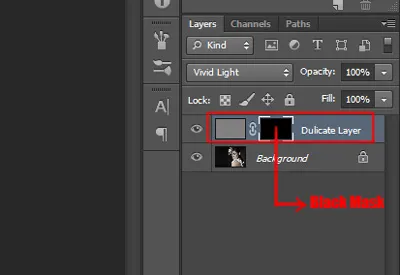
Grab the brush tool and lower it’s Opacity & Flow up to 50%. Although it could also be done by lowering Flow alone.

Related Topics:
The difference between opacity and flow
Opacity is the amount of transparency in your brush color. So, if you only reduce the Opacity of brush to say 30% and starting painting (by clicking and holding it), you will notice whenever your brush over laps your previous stroke nothing happens. But if you paint a new stroke (clicking again and holding) on your previous stroke, the overlapping path will be darker as the overlapping strokes Opacity will be merged. This case only ‘New overlapping strokes’ get darker.
Flow is the amount of color dropped by the Brush while painting (click, hold and drag). In case of Flow, even if you don’t break the stroke and start overlapping, the resultant stroke will be darker. In this case not only ‘New overlapping stroke’ but a single overlapping stroke will also get darker.
Make sure that the Foreground Color is white and if it is not press D on your keyboard. Although D is the shortcut for Default colors which are Black in Foreground Color and White in Background Color. But while working on a mask, they reverse.
Now, start painting over the areas where you want to create the smoothness .i.e., skin. Do not paint over those areas that are supposed to be sharp like Eyes, beneath the nose, Lips and Hair.
If you have accidentally painted over some extra areas you can simply press the X button on your keyboard. This will switch the Foreground color and the Background color (I am assuming you too have White as Foreground color and Black as Background color from the previous step) and make it Black instead of White.
You can again paint over those areas where you want your sharpness back. You can always go ahead and decrease the Fill of the layer, if you feel like there is too much smoothness.
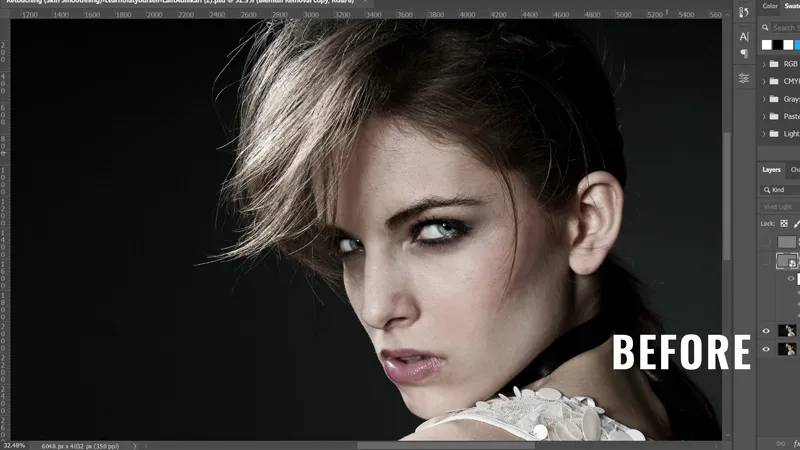
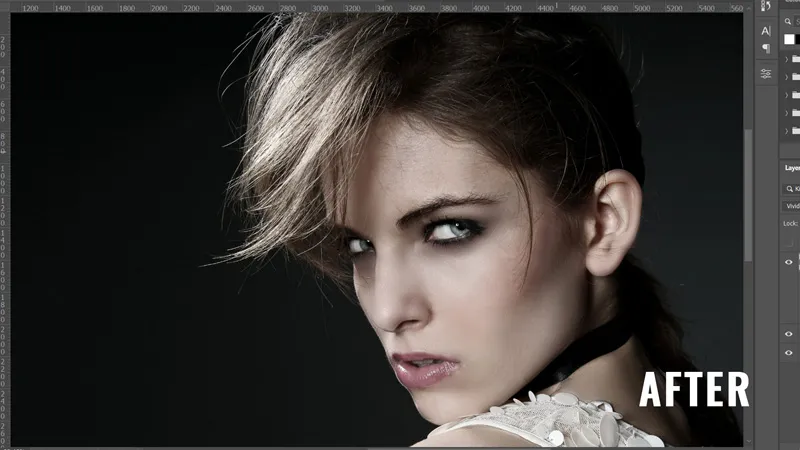
Note: Before starting this skin softening or skin smoothening procedure make sure you have removed all the blemishes, irregularities or moles from your image. Because any kind of skin smoothening above them may make the image look unappealing.
Related Topics:
Recreating the Skin Texture and Contouring
Like I said earlier, the first thing to really begin with is removing skin blemishes or any other irregularities. Now, I will be using second image and heal it first for it’s blemishes or irregularities.
To do that create a new layer, here I am duplicating the original image. Select the ‘Healing Brush Tool’ from the toolbar and start removing the blemishes. To clearly see the blemishes in the skin create a Black & White Adjustment layer.
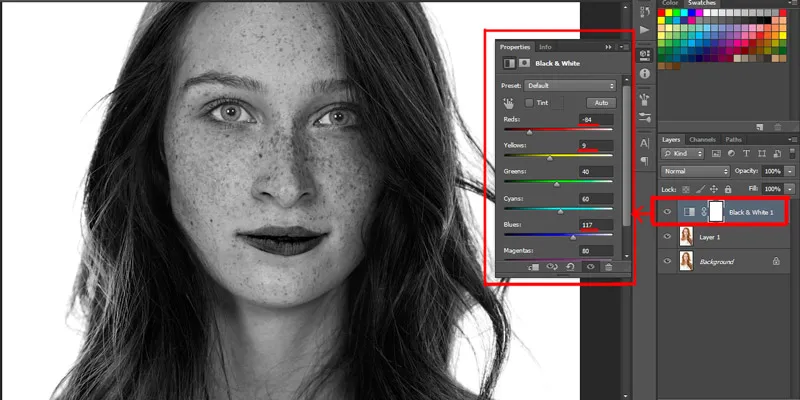
Desaturating an image will help you easily identify the irregularities in it. Take down the Reds and Yellows and increase the Blues depending upon the skin tone. Remember to work on the layer below the Black & White Adjustment layer.
Now you can prominently see where those blemishes are. While working on the blemishes layer make sure that the ‘Current and Below layers’ is checked so that you don’t sample from ‘Black & White Adjustment layer’. Hold the Alt key and take the sample and start painting over the blemishes. This process is a bit lengthy and may seem time-consuming but that’s how it’s done.
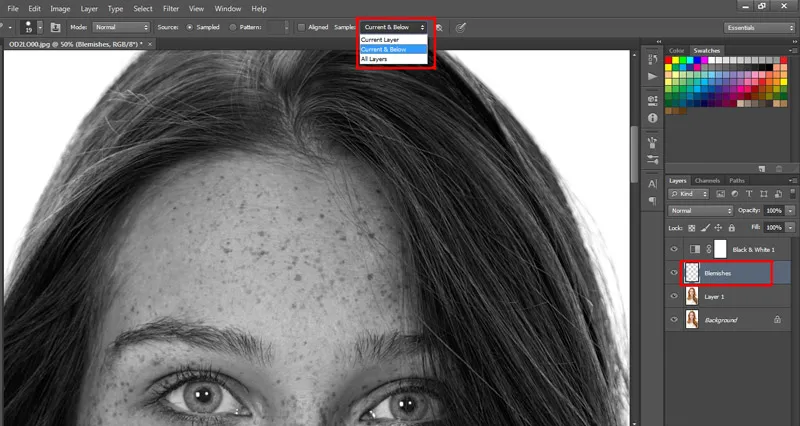
Here’s the result after removing blemishes:
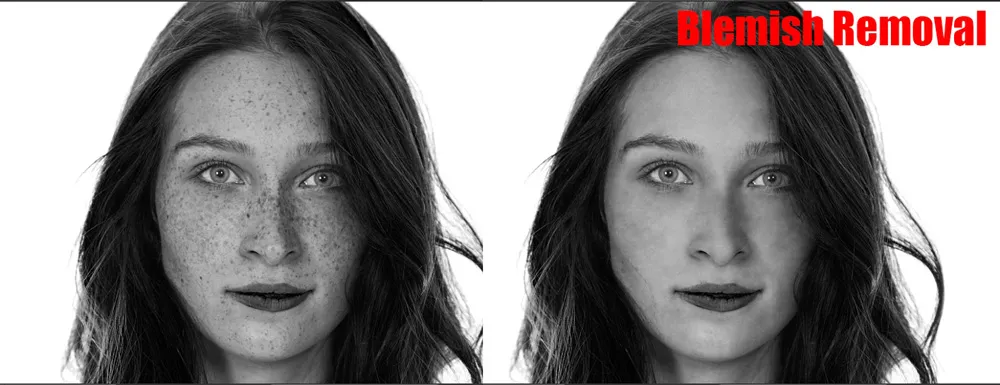
Please note depending on your image, there might be some irregularities left or some smoothness may occur. Until it’s in a small amount it’s manageable and further steps will dissolve them.
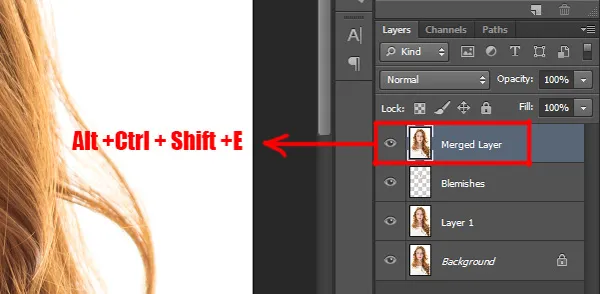
So, after you are done removing all your blemishes delete the Black & White adjustment layer. In your layer’s panel, you will see two layers, one is your ‘blemishes’ and the other is your image. Before you proceed any further, merge these two layers.
To do that press Alt + Shift + Ctrl + E on your keyboard and this will create a stamp visible layer of whatever you see on the screen.
Now, take a new layer and fill it with Black color. In the menu bar, go to Filter menu and choose ‘Noise’. A flyout menu will open up as you click on it and from this chose ‘Add Noise’ option.
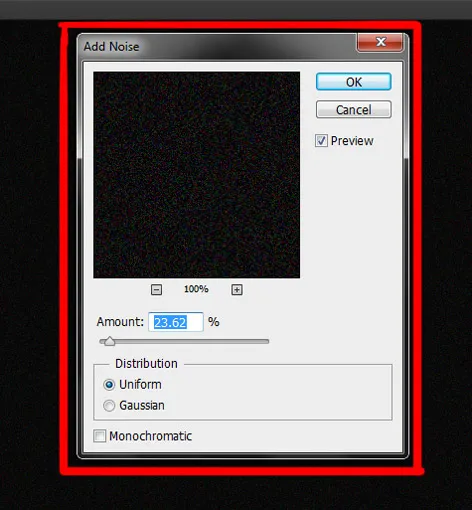
In its dialogue box adjust the noise amount, keep this at a relatively low value and click ‘OK’ to apply the effect. Change the blend mode of this layer to ‘Screen’.
Like the previous process, again make a Black mask or inverted mask and start painting over the cheeks or the areas where you want to retain the texture.
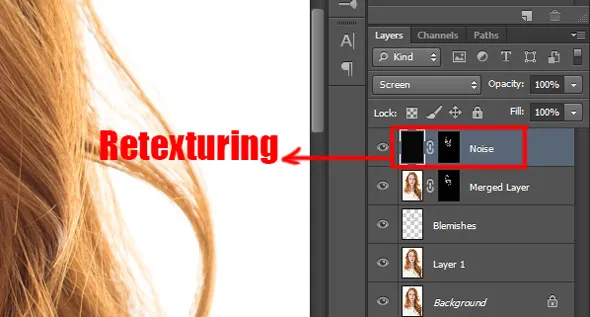
Related Topics:
Contouring
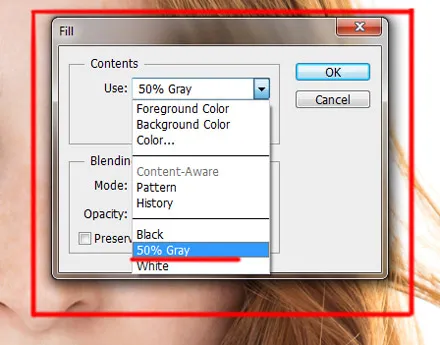
Now, after completing all the above steps, go to edit menu in the options bar, select ‘Fill’ or use shortcut press Shift + F5 in your keyboard and choose the option ‘50% Gray’. Change the blend mode of this layer to ‘overlay‘.
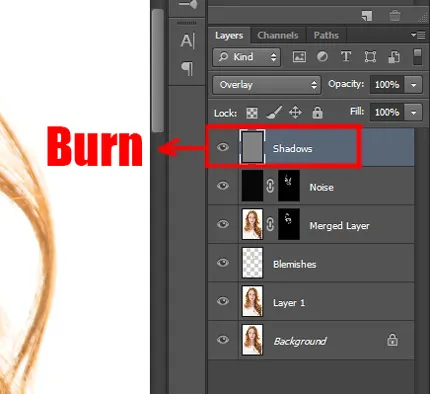
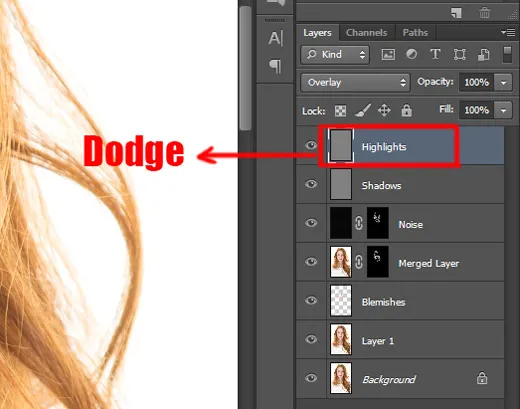
Grab the burn tool from the toolbar and start applying it to the shadows and dark areas of the image. You can adjust it’s strength or decrease the opacity of that layer if you find the effect too prominent. I named the layer ‘Shadows’.
Take another layer, repeat the above process of filling the layer with ‘50% Gray’ and change the blend mode to ‘Overlay’. Grab the ‘Dodge tool’ and apply it in the same way you did with burn tool and name this as ‘highlights’.
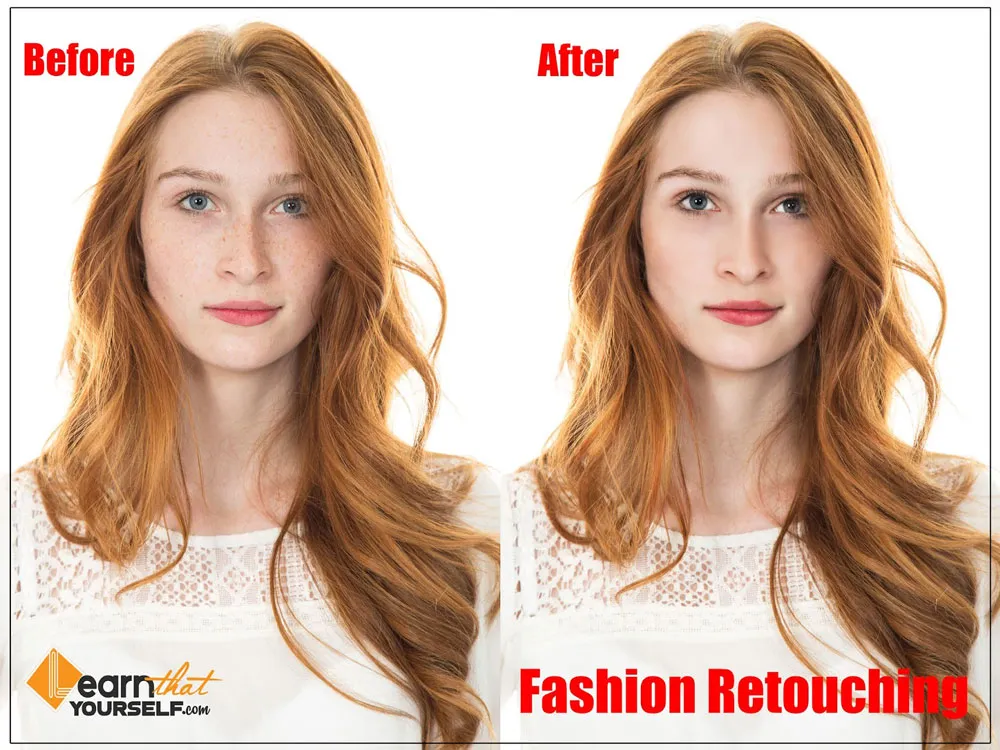
Now, you can compare the ‘Before & After’ of your photos to see the difference, although the natural beauty of the subject is still intact.
Related Topics:
- How to create New Document in Photoshop
- Color Settings in Photoshop
- Color Profile
- Color Mode
- Bit Depth
- 5 Types of Masking in Photoshop
- Fade Command in Edit menu in Photoshop
- Search in Photoshop
- Check Spelling in Photoshop
- Find and Replace Text in Photoshop


